WordPress Image Optimization: Boost Speed & Quality
# WordPress Image Optimization: Reduce Size Without Losing Quality
Images make your WordPress site visually appealing and engaging, but they can also dramatically slow down your pages if not properly managed. Effective **wordpress image optimization** is essential for maintaining fast load times, improving user experience, and boosting your search engine rankings. When you reduce image file sizes without sacrificing visual quality, you create a better experience for every visitor while improving your site’s overall performance.
Many website owners upload high-resolution images directly from their cameras or design software without considering the impact on loading speed. These oversized files can turn a lightning-fast site into a sluggish experience that drives visitors away. Understanding how to optimize images properly is one of the most impactful improvements you can make to your WordPress site.
## The Crucial Role of Images in Web Performance and SEO
Images serve as powerful tools for communication, breaking up text and making content more digestible. However, they represent a double-edged sword for website performance. Large, unoptimized images are often the primary culprit behind slow-loading websites, consuming bandwidth and testing your visitors’ patience.
When your site loads slowly, users don’t wait around. Research consistently shows that visitors expect pages to load within two to three seconds, and many will abandon a site that takes longer. High bounce rates signal to search engines that users aren’t finding what they need, which can negatively impact your rankings.
Google has made page speed a confirmed ranking factor for both desktop and mobile searches. The search giant’s Core Web Vitals initiative specifically measures user experience metrics, including Largest Contentful Paint (LCP), which often involves images. Sites that load quickly provide better user experiences and earn preferential treatment in search results.
The challenge lies in finding the sweet spot between image quality and file size. You want images that look crisp and professional while loading almost instantaneously. This balance is achievable through proper **wordpress image optimization** techniques that preserve visual integrity while dramatically reducing file sizes.
Understanding this balance requires knowledge of compression methods, file formats, and delivery strategies. When implemented correctly, these techniques can reduce image file sizes by 50-80% without noticeable quality degradation. The result is a faster site that ranks better and keeps visitors engaged.
## Understanding Image File Types and Their Best Use Cases
Choosing the right image format is your first critical decision in the optimization process. Each format has distinct characteristics that make it suitable for specific types of images and use cases.
JPEG (or JPG) remains the most common format for photographs and complex images with many colors and gradients. This format uses lossy compression, which means some data is permanently removed to reduce file size. For photographic content, JPEGs offer excellent compression ratios with minimal visible quality loss when properly optimized. You can typically compress JPEGs to 60-80% quality without noticeable degradation.
PNG format excels when you need transparency or when working with images containing sharp lines, text, or solid colors. Logos, icons, screenshots, and graphics with text overlay work best as PNGs. This format supports lossless compression, preserving every pixel of the original image. The trade-off is larger file sizes compared to JPEGs, especially for complex images.
GIF format serves a niche purpose for simple animations and images with very limited color palettes (256 colors maximum). While GIFs were once popular for web graphics, they’ve largely been superseded by more efficient formats. Use GIFs only for simple animations or when you need broad compatibility with older systems.
WebP represents the modern standard for web images, offering superior compression for both lossy and lossless images. Developed by Google, WebP can reduce file sizes by 25-35% compared to JPEGs and PNGs while maintaining comparable quality. This format supports transparency like PNG and animation like GIF, making it incredibly versatile. Most modern browsers now support WebP, making it an excellent choice for **wordpress image optimization**.
AVIF is an even newer format that promises better compression than WebP, but browser support is still growing. While worth watching, WebP currently offers the best balance of compression efficiency and compatibility.
Selecting the appropriate format before you even begin compression sets the foundation for optimal results. A photograph saved as PNG will always be unnecessarily large, while a logo saved as JPEG may show compression artifacts around text and edges.
## Core Principles of WordPress Image Optimization
Successful image optimization involves multiple strategies working together to deliver the best possible performance. These techniques span from pre-upload preparation to automated post-upload processing and intelligent delivery methods.
The fundamental goal is serving appropriately sized, efficiently compressed images that load quickly without degrading user experience. This requires understanding both the technical aspects of image processing and how WordPress handles media files.
WordPress automatically creates multiple sizes of each uploaded image (thumbnail, medium, large), which helps with responsive delivery. However, this default functionality represents just the beginning of what’s possible with proper optimization.
### Pre-Upload Optimization: The Foundation of Efficiency
Optimizing images before uploading them to WordPress gives you the greatest control and often produces the best results. This proactive approach prevents bloated files from ever entering your media library.
Start by resizing images to match their maximum display dimensions on your site. If your content area is 800 pixels wide, uploading a 4000-pixel-wide image wastes resources. Your browser will scale the image down, but the visitor still downloads the full file size. Resize images to their actual display dimensions, perhaps adding 50% for high-resolution displays.
Manual compression tools like TinyPNG, Squoosh, or Photoshop’s “Save for Web” feature let you fine-tune compression settings before upload. These tools show real-time previews so you can see exactly how compression affects quality. You can often achieve 60-70% file size reduction with imperceptible quality loss.
File naming conventions matter for SEO and organization. Use descriptive, keyword-rich filenames separated by hyphens (e.g., “wordpress-image-optimization-guide.jpg” instead of “IMG_1234.jpg”). Search engines use filenames as context clues for image content.
### Post-Upload Optimization: WordPress Plugins and Features
While pre-upload optimization is ideal, plugins can automate the process and handle images you’ve already uploaded. Popular **wordpress image optimization** plugins streamline compression, format conversion, and delivery.
Smush is a widely-used free plugin that automatically compresses images as you upload them. It offers bulk optimization for existing images and can convert images to WebP format. The plugin handles both lossy and lossless compression with configurable quality settings.
EWWW Image Optimizer provides similar functionality with additional format options. It can optimize images locally on your server or use cloud-based compression for better results. The plugin also handles PDF optimization and offers detailed control over compression settings.
Imagify, created by the team behind WP Rocket, offers three compression levels (Normal, Aggressive, and Ultra) with visual comparison tools. It includes automatic WebP generation and can resize images that exceed specified dimensions.
ShortPixel combines compression with adaptive image serving and smart cropping. Its API-based approach often achieves better compression ratios than server-side processing.
WordPress 5.5 and later includes native lazy loading for images, which defers loading off-screen images until users scroll near them. This feature significantly improves initial page load times without requiring plugins. Most optimization plugins also offer lazy loading with additional configuration options.
WebP conversion has become a standard feature in optimization plugins. These tools automatically create WebP versions of your images and serve them to compatible browsers while falling back to original formats for older browsers. This transparent conversion ensures optimal performance without compatibility concerns.
CDN integration amplifies optimization benefits by serving images from servers geographically closer to your visitors. Many optimization plugins integrate with popular CDNs or include their own delivery networks.
## Implementing Best Practices for Image Optimization on WordPress
Creating a consistent workflow ensures every image on your site meets optimization standards. This systematic approach prevents performance degradation as you add new content.
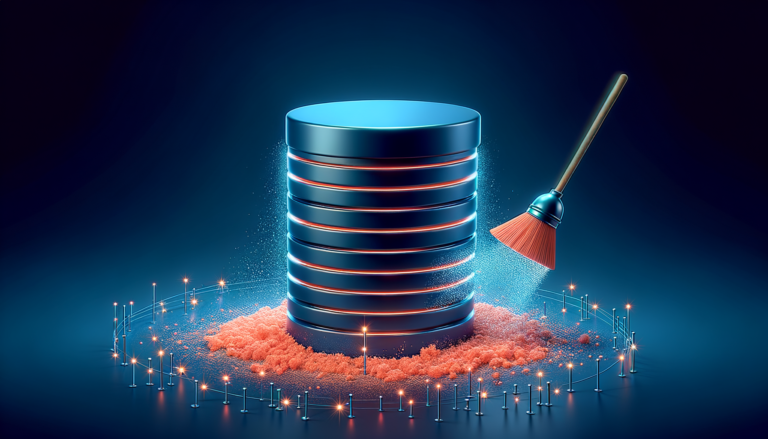
Start by auditing your existing images to identify optimization opportunities. Many plugins offer bulk optimization features that process your entire media library. This one-time investment can dramatically improve site speed, especially for older sites with hundreds of unoptimized images.
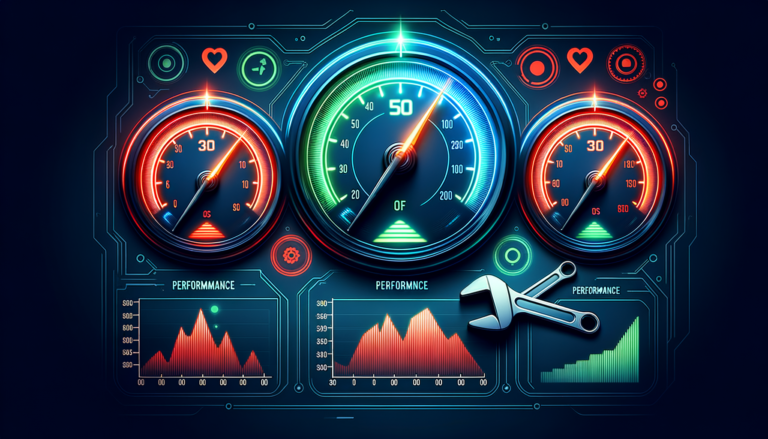
Regularly review site performance metrics using tools like Google PageSpeed Insights, GTmetrix, or Pingdom. These tools identify specific images causing performance issues and provide actionable recommendations. Monitor your Core Web Vitals scores to ensure images aren’t negatively impacting LCP or Cumulative Layout Shift (CLS).
### A Step-by-Step Optimization Workflow
Establish a repeatable process for every image you add to your site. This workflow becomes second nature with practice and ensures consistent results.
First, select the appropriate file format based on image content. Use JPEG for photographs, PNG for graphics with transparency, and WebP when possible. This decision impacts all subsequent optimization efforts.
Next, resize the image to appropriate dimensions before uploading. Calculate the maximum width the image will display at and resize accordingly. Remember that responsive images may need to be larger than the desktop display size to look sharp on high-resolution screens.
Compress the image using your chosen tool or plugin. If compressing manually, aim for quality settings between 60-80% for JPEGs. Compare the compressed version to the original at actual display size to ensure acceptable quality.
Add descriptive alt text that accurately describes the image content. This text serves both accessibility and SEO purposes, helping screen readers and search engines understand your images.
Enable lazy loading either through WordPress’s native feature or your optimization plugin. This ensures images load only when needed, reducing initial page weight.
### Beyond Compression: SEO and Accessibility Considerations
Image optimization extends beyond file size to encompass discoverability and accessibility. These factors contribute to both user experience and search engine performance.
Alt text (alternative text) serves as a textual replacement for images when they can’t be displayed or seen. Screen readers announce alt text to visually impaired users, making your content accessible to everyone. Search engines also use alt text to understand image content and context, influencing image search rankings.
Write descriptive alt text that conveys the image’s content and purpose within the page context. Avoid keyword stuffing, but do include relevant terms naturally. For example, “Screenshot showing wordpress image optimization plugin settings” is more useful than “image123” or “wordpress wordpress wordpress.”
Captions provide visible context for images and can improve engagement. While not required for every image, captions work well for screenshots, data visualizations, or images that need explanation. They also provide additional text content that search engines can index.
Image filenames contribute to SEO by providing another signal about image content. As mentioned earlier, use descriptive, hyphen-separated filenames that include relevant keywords. This practice helps with image search optimization and makes your media library more organized.
Structured data markup for images can enhance their appearance in search results. While not essential for basic optimization, schema markup can help images appear in rich results and improve click-through rates from image search.
## Common Pitfalls and How to Avoid Them
Even with the best intentions, certain mistakes can undermine your optimization efforts. Recognizing these common issues helps you avoid them.
Over-compression represents the most frequent error. In pursuit of the smallest possible file size, some site owners compress images so aggressively that quality suffers noticeably. Blurry, pixelated, or artifact-laden images harm your professional appearance more than they help performance. Always preview compressed images at actual display size and err on the side of slightly larger files if quality concerns arise.
Neglecting older images is another common oversight. Many site owners optimize new uploads while ignoring hundreds or thousands of existing images in their media library. Use bulk optimization features to process legacy images, starting with the most frequently viewed pages.
Ignoring mobile responsiveness can waste bandwidth and slow mobile load times. Serving full-size desktop images to mobile devices forces users to download unnecessary data. Implement responsive images using srcset attributes or plugins that automatically serve appropriately sized images based on device.
Failing to test after optimization can leave you unaware of issues. Always check your site’s speed and appearance after implementing changes. Verify that images display correctly across different devices and browsers.
Using too many large images on a single page overwhelms even optimized files. Consider whether every image adds value or if some could be removed. Gallery pages and image-heavy posts may need special attention to maintain acceptable load times.
Ignoring format conversion opportunities means missing out on significant file size reductions. If you’re not using WebP, you’re likely serving images 25-35% larger than necessary. Most modern plugins make format conversion effortless.
## Conclusion: A Faster, More Engaging WordPress Experience
Mastering **wordpress image optimization** transforms your site’s performance, user experience, and search engine visibility. The techniques covered here—from choosing appropriate formats to implementing compression, lazy loading, and responsive delivery—work together to create a faster, more efficient website.
Optimization isn’t a one-time task but an ongoing practice. As you add new content, maintain your optimization workflow to ensure consistent performance. Regularly audit your site, stay informed about new formats and techniques, and adjust your approach as technology evolves.
The effort you invest in image optimization pays dividends through improved rankings, lower bounce rates, higher engagement, and better conversion rates. Your visitors will appreciate the faster experience, even if they never consciously notice the optimized images behind it.
## Frequently Asked Questions
**What is WordPress image optimization?**
WordPress image optimization is the process of reducing the file size of images on your website without significantly compromising their visual quality, leading to faster loading times and improved SEO. This involves choosing appropriate file formats, compressing images, implementing lazy loading, and serving responsive images tailored to different devices.
**Why is image optimization important for my WordPress site?**
Optimized images improve website loading speed, enhance user experience, reduce bounce rates, and positively impact your site’s search engine ranking. Since images often account for 50-90% of a page’s total file size, optimization represents one of the most effective ways to improve performance. Faster sites keep visitors engaged and rank better in search results.
**What’s the best image format for WordPress?**
The ‘best’ format depends on the image. JPEG is great for photos, PNG for images with transparency, and WebP offers excellent compression for both. Aim to use WebP whenever possible, as it provides 25-35% better compression than traditional formats while maintaining quality. Most optimization plugins can automatically convert and serve WebP images with fallbacks for older browsers.
**Can I optimize images without losing quality?**
Yes, using lossless compression methods or modern formats like WebP can significantly reduce file size with minimal to no perceived quality loss. Balancing quality and size is key. For most web use, lossy compression at 70-80% quality produces visually identical results to the original while dramatically reducing file size. The human eye cannot detect the differences at normal viewing distances.
**Do I need a plugin for WordPress image optimization?**
While WordPress has some built-in image handling, plugins like Smush or Imagify offer advanced features for automated compression, WebP conversion, and lazy loading, making the process much easier and more effective. Plugins can also bulk-optimize existing images and automatically process new uploads, saving significant time while ensuring consistent results across your entire media library.