Accessibility Compliance Workflows for WordPress: Admin Guide
Streamline Your Accessibility Compliance: A Practical Workflow for WordPress Admins
Remember that gnarly feeling when your WordPress site throws a fit at 2 AM? Or when it crawls slower than a snail on a Sunday? Yeah, I’ve been there. Countless times. Fixing thousands of WordPress sites has taught me one thing: when something breaks, you need a solution, fast. And lately, the big one, the one that can hit you with legal headaches and alienate users, is accessibility. It’s not just a nice-to-have anymore; it’s a must-have. You’ve probably heard the stats: nearly every single website misses the mark on basic accessibility. That’s a huge chunk of potential users you’re shutting out, and let’s be honest, a ticking legal time bomb.
Why Accessibility Isn’t Optional Anymore
Talking Points:
* Legal mandates like the ADA and Section 508.
* Ethical considerations for digital inclusion.
* The expanding user base that benefits from accessible design.
Look, I get it. You’re juggling updates, security patches, and trying to keep your content fresh. Adding “website accessibility” to that list can feel like another impossible task. But here’s the hard truth: in the United States, businesses are legally obligated to ensure their websites are accessible, thanks to laws like the Americans with Disabilities Act (ADA). Federal entities have Section 508. This isn’t some abstract concept; it means real legal consequences. And honestly, beyond the legal stuff, it’s just the right thing to do. We’re building online spaces, and they should be welcoming to everyone, regardless of their abilities. Think about it – that means considering users who rely on screen readers, those who can’t use a mouse, or people with cognitive differences. Making your WordPress site accessible isn’t just about compliance; it’s about good business and good humanity.
Phase 1: The All-Important Accessibility Audit
Talking Points:
* Identifying current accessibility barriers on your site.
* Using automated tools for initial checks.
* The necessity of manual review for complex issues.
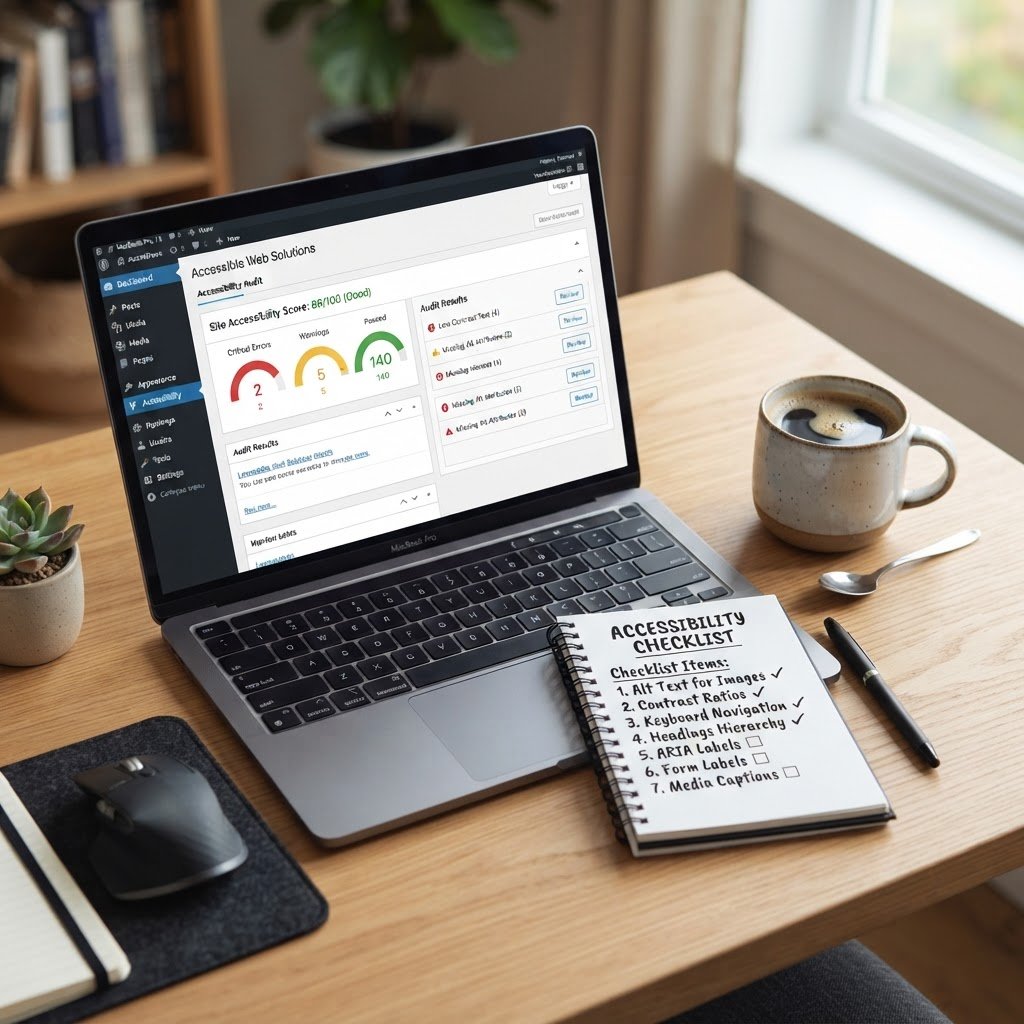
So, where do you even start? You’ve got to know where you stand. That means an initial site-wide accessibility audit. This is your baseline. It’s like going to the doctor for a check-up before starting a new fitness plan. You need to know your starting point to plan the route forward. We’ve all seen those automated accessibility testing WordPress tools. They’re handy for catching some obvious stuff – like missing alt text or basic color contrast issues. They can flag a good chunk of potential problems. But here’s the kicker: these tools often only catch about 30-40% of the actual WCAG compliance issues. The rest? That requires a human eye, a human brain. You can’t automate empathy or logical interpretation, and that’s what the remaining 60-70% of accessibility testing demands. This audit is your first big step in understanding your WordPress accessibility checklist and getting closer to WCAG compliance for WordPress.
Phase 2: Weaving Accessibility into Content Creation
Talking Points:
* Training content creators on accessibility best practices.
* Implementing accessibility checks during the content lifecycle.
* Making accessibility a standard part of your content process.
Once you know your site’s current state, you need to build accessibility right into how you create content. This isn’t a one-off fix; it’s about changing habits. Think about your writers, editors, and designers. They need to understand why this matters and how to do it. We’re talking about simple things that make a huge difference. For images, it’s not just about adding alt text; it’s about making those alt text descriptions meaningful. What’s in the image? What’s its purpose? Don’t just say “dog.” Say “Golden Retriever puppy playing fetch in a park.” For videos, it’s about captions and transcripts. For text, it’s about clear headings, readable fonts, and good color contrast ratios. This means integrating a mini-WordPress accessibility checklist into your content creation workflow. When a new blog post is drafted, it should also be checked for accessibility. When a new image is uploaded, its alt text needs a quick review. This proactive approach prevents new problems from popping up and makes managing WordPress accessibility standards a whole lot easier.
Phase 3: Choosing Accessible Themes and Plugins
Talking Points:
* Criteria for selecting accessibility-ready themes.
* Vetting plugins for accessibility compliance.
* The risks of poorly coded themes and plugins.
Your WordPress theme and plugins are the building blocks of your site. If they’re not built with accessibility in mind, you’re starting on shaky ground. I can’t tell you how many times I’ve seen a beautiful theme or a powerful plugin that completely tanks a site’s accessibility. It’s frustrating, believe me. Look for themes specifically labeled ‘accessibility-ready’ in the WordPress repository. These have passed a review process that checks for things like proper heading structures, keyboard navigation support, and sufficient color contrast. For plugins, it’s a bit trickier. Not all plugins are created equal. You need to do your homework. Check the plugin’s documentation. Does it talk about accessibility? Look at recent reviews. Are users reporting accessibility issues? I’ve learned to be skeptical of plugins that seem to do a lot but have minimal accessibility information. Remember, using poorly coded themes and plugins can actively create barriers, forcing you into costly site remediation later.
Establishing a Routine Maintenance Schedule
Talking Points:
* Why accessibility requires ongoing effort.
* Scheduling regular accessibility checks.
* Updating themes and plugins with accessibility in mind.
Here’s a tough pill to swallow: accessibility isn’t a one-time project. It’s like maintaining your car. You can’t just fix it once and expect it to run perfectly forever. WordPress updates, theme updates, plugin updates – they all have the potential to introduce or break accessibility features. You need a routine maintenance schedule for accessibility updates. I recommend setting aside time quarterly, or even monthly, to re-run some of those automated checks and do spot-checks manually. When you update your theme or a critical plugin, check its changelog. Did they make changes that could impact accessibility? If you’re updating your WordPress site, always do a quick check afterward. Think of it as accessible WordPress site maintenance. It sounds like more work, but trust me, it’s way less painful than dealing with a lawsuit or a flood of user complaints about inaccessible content.
Tools and Automated Solutions to Simplify Compliance
Talking Points:
* Leveraging browser extensions for quick checks.
* Utilizing dedicated accessibility testing platforms.
* Integrating accessibility tools into your development workflow.
Okay, I know I said automated testing isn’t the whole story, but that doesn’t mean you should ignore it. Far from it! These tools are lifesavers for efficiency. Browser extensions like WAVE or AXE can give you instant feedback as you browse your own site. They’re brilliant for catching obvious issues on the fly. Then there are more comprehensive platforms that can scan your entire site. Many offer features like automated accessibility testing WordPress, generating reports, and even suggesting fixes. Some are free, others are paid. The key is to find what fits your budget and your workflow. Integrating these tools into your development process means accessibility checks happen earlier and more often. This proactive approach helps catch problems before they go live, saving you time and headaches down the line. It’s all about making managing WordPress accessibility standards less of a chore and more of a habit.
Handling User Feedback and Reporting Barriers
Talking Points:
* Creating a clear channel for users to report issues.
* Responding promptly and empathetically to feedback.
* Using feedback to inform your remediation efforts.
Your users are your best resource, especially when it comes to finding accessibility barriers they encounter. You might have the most thorough audit process, but someone using a specific screen reader with specific settings might find something you missed. You absolutely need a clear, easy-to-find way for users to report accessibility issues. This could be a dedicated email address, a contact form with an accessibility option, or a link to a feedback portal. When a report comes in, treat it with the urgency it deserves. Don’t just dismiss it. Respond quickly, thank them for bringing it to your attention, and let them know you’re looking into it. Even if you can’t fix it immediately, acknowledging the issue goes a long way. This feedback is invaluable for your site remediation efforts. It highlights real-world problems and helps you prioritize your fixes. It’s a vital part of your digital inclusion strategy.
The Dance of Automated Testing vs. Manual Oversight
Talking Points:
* Understanding the limitations of automated tools.
* The indispensable role of human judgment in accessibility.
* Balancing efficiency with the need for thoroughness.
Let’s circle back to testing, because it’s a hot topic and a common point of confusion. Automated testing is fantastic. It’s efficient, it’s scalable, and it can catch a lot of low-hanging fruit. It’s great for flagging things like missing alt text, insufficient color contrast ratios, or improper heading structures. But remember that statistic I mentioned? Automated testing alone only finds about 30-40% of WCAG compliance issues. The remaining 60-70% requires human judgment. Think about complex keyboard navigation – can a user tab through your site logically and intuitively? Can they easily understand the content, even if they have cognitive disabilities? These are things a machine can’t truly assess. That’s where manual testing, often involving actual users with disabilities, becomes essential. It’s not about choosing one over the other; it’s about using them together. Automated tools give you speed; manual oversight gives you accuracy and depth. It’s about achieving real user experience optimization.
Documenting Your Accessibility Efforts: The Statement and Beyond
Talking Points:
* Creating a clear and comprehensive accessibility statement.
* Documenting your accessibility policies and procedures.
* Using documentation for internal training and external transparency.
This is one area where many folks drop the ball, and it’s a shame because good documentation makes everything else easier. You need an accessibility statement. This is a public declaration of your commitment to accessibility. It should clearly state your goals, the standards you aim to meet (like WCAG 2.1 AA, which is the technical standard often cited in ADA compliance cases), and what you’re doing to achieve them. It should also include information on how users can report issues and what your process is for addressing them. Beyond the public statement, keep internal documentation. What are your accessibility policies? What are your standard operating procedures for content creators, developers, and QA testers? This documentation is crucial for training new team members, ensuring consistency, and demonstrating your commitment if ever questioned. It’s a core part of your digital inclusion strategy and shows you’re serious about ADA compliance for WordPress websites.
Common Pitfalls to Sidestep
Talking Points:
* Over-reliance on accessibility widgets/overlays.
* Treating accessibility as a one-time fix.
* Ignoring accessibility for smaller sites or specific content types.
Alright, let’s talk about what not to do. I’ve seen so many WordPress admins fall into the same traps. The biggest one? Believing that those